Welcome to The Social Post – the place where the incredible and ever-changing world of Bridal Social Media is discussed. For more about the author, Conner Galway, check out his bio at the bottom of this post. Enjoy!
You’ve probably noticed that Facebook has changed – again.
For your personal profile, the switch from old Facebook to the new Timeline version probably caused little more than a reorganization of your stuff and a few minutes to get used to it.
Business Pages, however, have been effected much more dramatically. For today I’m going to focus on the positive opportunities, which are many. For a lot of people, some of this stuff may be review but it’s important to have the foundation of your Page solid first, then we can start talking about the more advanced stuff.
Cover Photo

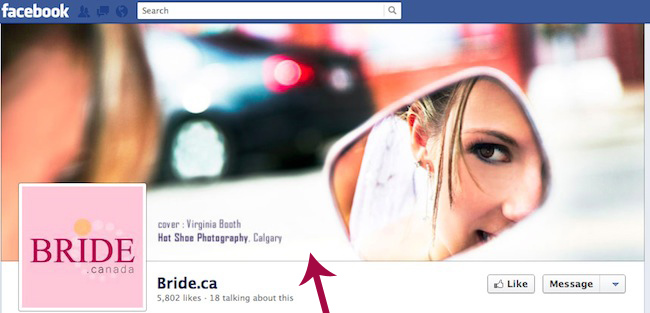
The most visible change is the addition of a large banner image opportunity. When Pages are changed to Timeline automatically, no cover photo appears. In order to add a photo, simply click the Add a Cover button on the top of the Page.
Making a Great Cover Photo
The cover is the first thing that people see when they come to your Page, and it’s the only major area that you have control over. The best brands use cover photos as an opportunity to set a mood and hilghight the features that make their businesses unique.
What Size Should A Cover Photo Be?
Facebook has given us a defined area to play with: 850 x 315 pixels.
The uploader will stretch or press photos of other sizes to fit the area, but to avoid distortion make sure that your photo fits perfectly.
Profile Picture

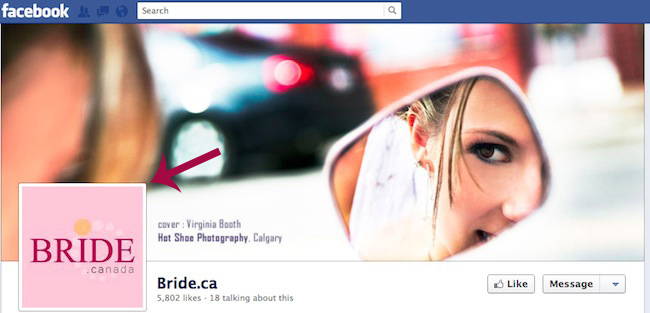
Facebook Profile Pictures are no longer the places that we have to jam our whole brand personalities into; the cover photo handles a lot of that for us now. Profile pictures are best used to present clean, simple branding. The most common and effective photo to use for most businesses is the brand’s icon.
The profile picture becomes the small image that appears beside ever post and comment that the Page makes on Facebook, so it’s important that it can be seen clearly even when it’s very small.
What Size Should a Profile Picture Be?
Again, Facebook will re-size most images for you, but to ensure that you’re giving the best possible impression to the people who are visiting your Page, it’s worth it to take a minute and make sure that what you’re putting up is the perfect size.
Facebook gives us 180 x 180 pixels of space. Before uploading your image, test it at 52 x 52 pixels as well. That’s the size that it will be appearing next to your posts in your Timeline. Show it to a few friends at that size and ask them if they know what it is. If yes, then you’re all set to upload.
Milestones
One of the most hyped, and least used, features of Facebook Pages is the ability for owners to chronicle the history of their brands back to their inceptions. The idea is that people can scroll back and get a visual representation of your business’ story.
Milestones such as your first location’s opening, rebranding, expansion to a new city or even the hiring of a new employee can be added to your timeline.
How to Add A Milestone

Adding a Milestone is nearly as simple as posting an update, and is done much the same way.
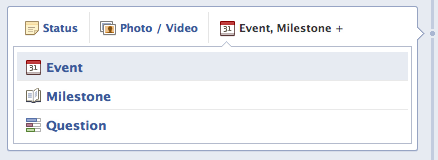
First, make sure that you are using Facebook as your Page. Next, on your Page, where you normally post Status Updates, look for the “Event, Milestone +” button. Click it.
A menu will come down, select Milestone and fill out the details.
You’ll notice that your business’ birth must be posted before anything can be added.
Invite People to The Party

Now that you have an awesome Page set up and optimized for the new Timeline format, you can start to spread the love. One of the most powerful tools that Facebook has given us for building new or small Pages is the Invite Friends feature.
We can now send notifications to one, many or all of our personal Facebook friends that will alert them to Like your Page. At Junction, we’ve found that as much as 700% more people will click on these notifications than the old Page Suggestion format.
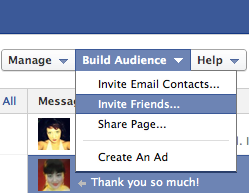
Using Facebook as yourself rather than your Page, navigate to the top of your Facebook Page where it says “Build Audience”. Click on Invite Friends and pick the ones who you want to invite.
I Just Want to Invite Everyone
Sorry, there’s no “select all” option. As annoying as that may be right now, be thankful that Facebook has set it up this way in order to minimize the speed that people could blast their entire Friend lists with invite after invite. Unfortunately, spammers ruin everything.
Once you’ve sent invitations to all of your buddies, ask everyone else who has administrative access to the page to do the same. We’ve found that most people can easily get 40 new Likes to their Pages with only a few minutes of work.
Private Messaging

Once you’ve got all of your people to come over and Like your Page, they’ll probably want to compliment you on your gorgeous new Cover Photo. For the first time ever, Pages can now have private conversations with people using the Message button.
Incoming Messages will appear as notifications when you login. The conversations work much the same way that Facebook Chat does on Profiles.
There’s not much that you can do to enhance the experience that your visitors have when it comes to Messaging, except to be responsive when they do talk to you, and let them know that you are open to those chats by posting an update to your Timeline.
Good Luck with your shiny new Page and, as always, if you have any questions or if I wasn’t able to make something clear enough please contact me at ConnerATJunctionMarketingDOTcom or get in touch with us at @JunctionYVR.

